|
EzyChart Versions 4.02 or greater require the user to import a text file (into EzyChart) after each download with Bodhi Freeway 3. This is required to update the signature key file which was added to the EzyChart (.pce) format. If you are using a version of EzyChart that is lower than 4.02, please refer to these instructions. If you are using EzyChart 6 or above you will need to purchase a BodhiGold subscription as Bodhi Freeway 3 is not compatible with this version.
With one download, Bodhi Freeway 3 not only creates the EzyChart (.pce) files you need to view charts but also creates the importable daily text file to unlock your charts.
These instructions will take you through four processes:
- Configuring Bodhi Freeway 3 to use the EzyChart data format.
- Configuring EzyChart to read the Bodhi Freeway 3 EzyChart directories.
- Importing the daily text file into EzyChart.
- Opening a chart in EzyChart.
Configure Bodhi Freeway 3 for EzyChart
- Start Bodhi Freeway 3, by selecting the following from your Microsoft® Windows Start menu: Start > Programs > Infosoft > Bodhi3 > Freeway
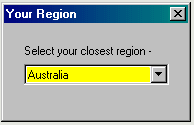
- Select your closest Region from the drop-down box, then click [x].
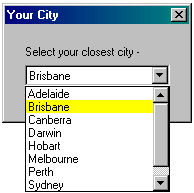
- Select your Nearest city from the drop-down box, then click [x].
- Select your Charting Software - EzyChart from the drop-down box, then click [x]. This automatically chooses the EzyChart (.pce) format.
- A dialog box will appear explaining how Bodhi Freeway 3 has been setup. This box includes information on your location, data selection, charting software and database directories. Take note of this information.
- Click OK. The registration screen will appear. Before you can download data you will need to email us the Installation Code. You will then be given your personalised registration User and Code. Exit the screen by clicking the [x].
- Click the Configure button.
- The following instructions will show you how to fetch up to 6-months historical data:
- Click on the + next to Australia.
- Click on the + next to Australian Stock Exchange.
- Click on Equity.
- Put the Imported and Exported dates back 6-months.
- Exit the Product Manager list.
- Exit the Module Manager screen.
- Connect to the Internet then click the Catchup button. Bodhi Freeway 3 will now download and export the last 6-months of data to your hard drive (c:\My Databases\EzyChart\ASX).
Congratulations, you have successfully configured Bodhi Freeway 3 and imported 6-months of data into a EzyChart (.pce) format. From now on, you will only need to press the Catchup button in Bodhi Freeway 3 each night to retrieve the latest data.
Configuring EzyChart to read the Bodhi Freeway 3 EzyChart directories
NB. These instructions and illustrations were written and captured using EzyChart Version 5.01.
- Open EzyChart.
- Go to Edit>Configure EzyChart.
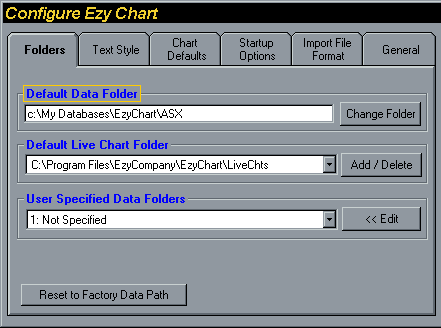
- In the Folders tab, change the Default Data Folder so it reads:
c:\My Databases\EzyChart\ASX.
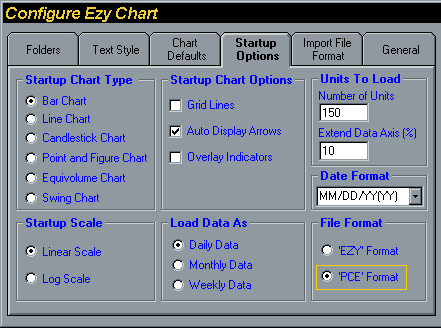
- In the Startup Options tab, change the File Format to 'PCE' Format.
- In the Import File Format tab, change the Data Format to Ticker Code, Date, Open, High, Low, Close, Volume.
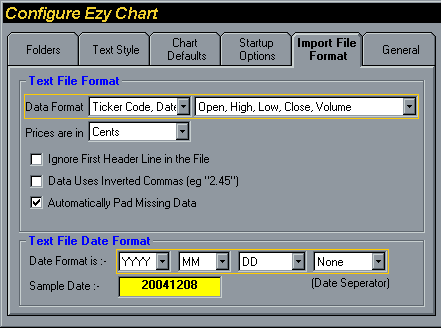
- Also change the Text File Date Format to YYYY MM DD None.
- Click the Finished button. For these settings to take effect, you must close out of EzyChart completely then reopen it.
Importing the daily text file into EzyChart
- Open EzyChart.
- Go to File>Import Data to>Default EzyChart Folder.... The File Conversion and Updating dialog box will appear.
- Navigate to your c:\mydata\EC\daily directory. This is where Bodhi Freeway 3 places the daily update text file. EzyChart will remember this directory from now on.
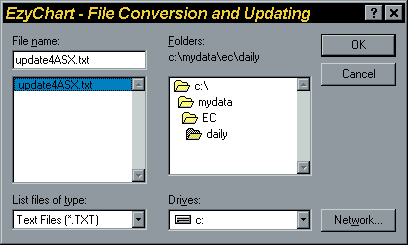
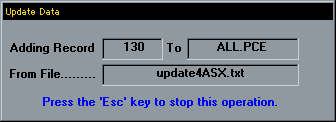
- Select the update4ASX.txt file and click OK to start importing the data. Please Note: If the update4ASX.txt file is not displayed, make sure the List files of type drop-down box is set to Text Files (*.TXT). You will have other update files if you download data from multiple exchanges. You can differentiate between these files by the 3-letter Exchange Code embedded in the filename.
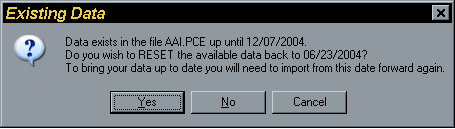
- If a Existing Data dialog box appears, select No.
- If a Continue dialog box appears, select No.
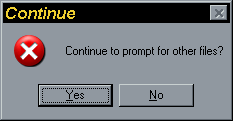
- The text file will now append to your previous records. You will need to repeat steps 4 to 7 if you have multiple update files to import.
Opening a chart in EzyChart
- Open EzyChart.
- Go to File>Open EzyChart File....
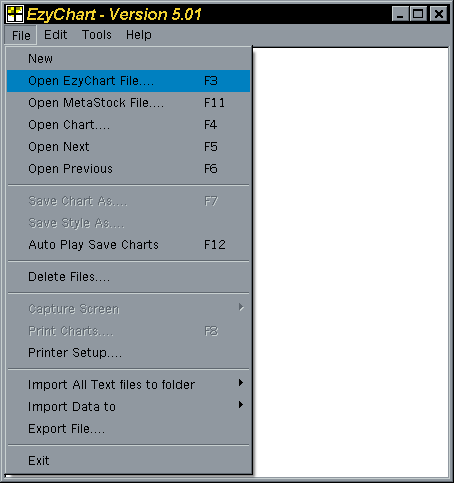
- The Open File dialog box will appear. If you have configured EzyChart correctly, it should automatically open in your default directory and display all available exchange codes (i.e. ALL.PCE) in the left-hand box.
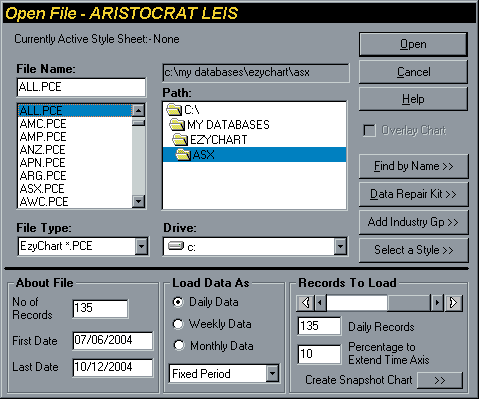
- Either enter a chart to view in the File Name: box or use the scroll bar below to scroll through the list then select one with your mouse.
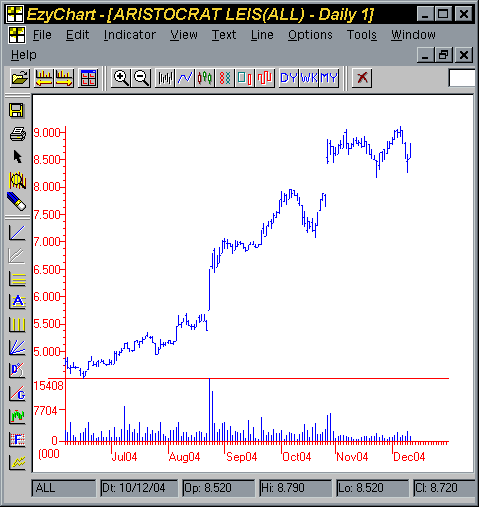
- To open the chart, click the Open button. Your chart will now be displayed.
|